Mechanical CAD Unigraphics NX Training in Coimbatore
Unigraphics NX training institute in Coimbatore This Mechanical CAD Unigraphics NX Training in Coimbatore aims to get people familiar with the concepts of NX cad and its features with theory and practicality. The content is so designed so that people can start applying the same in industrial problems as well as competitions related to it.
Unigraphics NX (also known as Siemens nx) is an advanced High-end CAD/CAM/CAE software package originally developed by UGS Corporation, but since 2007 it is owned by Siemens PLM Software. It is used, among other tasks, for Design, engineering analysis, manufacturing finished design by using included machining modules.
Free Live Demo
Session
100% Successful Course Completions
Training From Professionals Experts
Fully Hands-on
Training
Certification after
Course
Unigraphics NX Training in Coimbatore key Features
Joining this NX CAD Training in Coimbatore, you will get benefits such as:
- Access to video lectures and course materials
- Earn a certification free of cost
- Additionally, content on industry standard
- Case Studies and real-time projects
- Top Administrators & Experts.
About Siemens Unigraphics NX Training in Coimbatore
Cubikcadd Training in Coimbatore course designed in such a way that you will learn about all important tools and commands of the software. This is a streamlined course to take you from knowing nothing about NX to give you all the knowledge and skills needed to become a certified siemens NX designer. This course should enable you to, with confidence, use NX to design your next innovation. After this course, you can proudly list your NX skills in your resume.
Quick Enquiry!
Course Details
Unigraphics NX Syllabus
1: INTRODUCTION
- Introduction to NX
- System Requirements
- Getting Started with NX
- Important Terms and Definitions
- Understanding the Functions of the Mouse Buttons
- Toolbars
- Hot Keys
- Color Scheme
- Dialog Boxes in NX
- Selecting Objects
- Deselecting Objects
- Selecting Objects Using the Quick Pick Dialog Box
- Self-Evaluation Test
2: DRAWING SKETCHES FOR SOLID MODELS
- The Sketcher Environment
- Starting NX
- Starting a New Document in NX
- Invoking Different NX Environments
- Creating Three Fixed Datum Planes (XC-YC, YC-ZC, XC-ZC)
- Displaying the WCS (Work Coordinate System)
- Invoking the Sketcher Environment
- Sketching Tools
- Drawing Sketches Using the Profile Tool
- Using Help Lines to Locate Points
- Drawing Individual Lines
- Drawing Arcs
- Drawing Circles
- Drawing Rectangles
- Placing Points
- Drawing Ellipses or Elliptical Arcs
- Drawing Conics
- Drawing Studio Splines
- Filleting Sketched Entities
- The Drawing Display Tools
- Fitting Entities in the Current Display
- Zooming to an Area
- Dynamic Zooming
- Panning Drawings
- Fitting View to Selection
- Restoring the Original Orientation of the Sketching Plane
- Setting Selection Filters in the Sketcher Environment
- Selecting Objects
- Deselecting Objects
- Using Snap Points Options While Sketching
- Deleting Sketched Entities
- Exiting the Sketcher Environment
3: ADDING GEOMETRIC AND DIMENSIONAL CONSTRAINTS TO SKETCHES
- Constraining Sketches
- Concept of Constrained Sketches
- Under-Constrain
- Fully-Constrain
- Over-Constrain
- Degree of Freedom Arrows
- Geometric Constraints
- Applying Additional Constraints Individually
- Applying Automatic Constraints to a Sketch
- Controlling Inferred Constraints Settings
- Showing All Constraints in a Sketch
- Turning off the Display of All Constraints in a Sketch
- Showing/Removing Constraints
- Converting a Sketch Entity into a Reference Entity
- Dimensional Constraints
- Applying Horizontal Dimensions
- Applying Vertical Dimensions
- Applying Parallel Dimensions
- Applying Perpendicular Dimensions
- Applying Angular Dimensions
- Applying Diameter Dimensions
- Applying Radius Dimensions
- Applying Perimeter Dimensions
- Applying Dimensions by Using the Inferred Dimensions Tool
- Editing the Dimension Value and Other Parameters
- Animating a Fully Constrained Sketch
- Measuring the Distance Value between a Objects in a Sketch
- Measuring the Distance between Two Objects in a Sketch
- Measuring the Projected Distance between Two Objects
- Measuring the Screen Distance between Two Objects
- Measuring the Length of an Arc or a Line
- Measuring the Angle between Entities
- Measuring the Angle Value Using the By Objects Option
- Measuring the Angle Value Using the By 3 Points Option
- Measuring the Angle Value Using the By Screen Points Option
4: EDITING, EXTRUDING, AND REVOLVING SKETCHES
- Editing Sketches
- Trimming Sketched Entities
- Extending Sketched Entities
- Creating a Corner between Sketched Entities
- Mirroring Sketched Entities
- Copying, Moving, and Rotating Sketched Entities
- Transforming Sketched Entities
- Editing Sketched Entities by Dragging
- Exiting the Sketcher Environment
- Changing the View of the Sketch
- Creating Base Features by Extruding
- Extrude Dialog Box Options
- Creating Solid Revolved Bodies
- Hiding Entities
- Showing Hidden Entities
- Hiding All Entities Using a Single Tool
- Rotating the View of a Model in 3D Space
- Setting Display Modes
5: WORKING WITH DATUM PLANES, COORDINATE SYSTEMS
- Additional Sketching and Reference Planes
- Types of Datum Planes
- Creating Three Fixed (Principle) Datum Planes
- Creating Relative Datum Planes
- Creating Datum Coordinate Systems
- Creating Fixed and Relative Datum Axes
- Other Extrusion Options
- Specifying the Boolean Operation
- Specifying Other Extrusion Termination Options
- Projecting External Elements
6: ADVANCED MODELING TOOLS-I
- Advanced Modeling Tools
- Creating Simple Holes
- Creating Counter bore Holes
- Creating Countersink Holes
- Creating Holes by using the Hole Tool
- Creating General Holes
- Creating Drill Size Hole
- Creating Screw Clearance Hole
- Creating Threaded Hole
- Creating Hole Series
- Creating Grooves
- Creating Rectangular Grooves
- Creating Ball End Grooves
- Creating U Grooves
- Creating Slots
- Creating Rectangular Slots
- Creating Ball-End Slots
- Creating U-Slots
- Creating T-Slots
- Creating Dove-Tail Slots
- Creating Chamfers
- Creating a Chamfer Feature Using the Symmetric Method
- Creating a Chamfer Feature Using the Asymmetric Method
- Creating a Chamfer Feature Using the Offset and Angle Method
- Creating an Edge Blend
7: ADVANCED MODELING TOOLS-II
- Advanced Modeling Tools
- Instance Feature Tool
- Creating Rectangular Arrays Using the Instance Feature Tool
- Creating Circular Arrays Using the Instance Feature Tool
- Using the Pattern Face Option of the Instance Feature Tool
- Mirror Feature Tool
- Mirror Body Tool
- Sweeping Sketches along the Guide Curves
- Creating Swept Features
- Creating Tubes or Cables
- Creating Threads
- Creating Symbolic Threads
- Creating Detailed Threads
- Creating Shell Features
- Shelling the Entire Solid Body
8: EDITING FEATURES AND ADVANCED MODELING TOOLS-III
- Editing Features
- Editing a Hole Feature
- Editing the Positioning of a Hole Feature
- Editing the Positioning of a Groove Feature
- Editing the Positioning of a Slot Feature
- Editing the Parameters of Features
- Editing the Parameters of Features with Rollback
- Editing Sketches of the Sketch-based Features
- Reordering Features
- Advanced Modeling Tools
- Creating Boss Features
- Creating Pocket Features
- Creating Pad Features
- Creating Drafts
9: ASSEMBLY MODELING-I
- The Assembly Environment
- Invoking the Assembly Environment
- Invoking the Assembly Environment Using the Assembly
- Template from the New Dialog Box
- Invoking the Assembly Environment in the Current Part File
- Types of Assembly Design Approaches
- Creating Bottom-up Assemblies
- Placing Components in the Assembly Environment
- Changing the Reference Set of a Component
- Applying Assembly Constraints to Components
- Points to Remember while Assembling Components
- Creating a Component Array in an Assembly
- Replacing a Component in an Assembly
- Moving a Component in an Assembly
- Repositioning a Component in an Assembly
- Mirroring a Component in an Assembly
- Modifying a Component in the Assembly File
10: ASSEMBLY MODELING-II
- The Top-down Assembly Design Approach
- Creating Components Using the Top-down Assembly Design Approach
- Creating Subassemblies
- Editing Assembly Constraints
- Modifying the Assembly Constraints
- Checking the Interference between the Components of an Assembly
- Checking Interference and Clearance
- Using the Check Clearance Analysis
- Checking Interference Using the Assembly Clearance Method
- Checking Interference and Clearance, and Analyzing
- Cross-sections of Components Using the View Section Tool
- Creating Exploded Views of an Assembly
- Exploding Views Automatically
- Exploding Views Manually
11: SURFACE MODELING
- Introduction to Surface Modeling
- Invoking the Sheet Modeling Environment
- Creating an Extruded Surface
- Creating a Revolved Surface
- Creating a Ruled Surface
- Creating a Surface Using the Through Curves Tool
- Creating a Surface Using the Through Curve Mesh Tool
- Creating a Surface Using the Four Point Surface Tool
- Creating a Swoop Surface
- Creating the Planar Surfaces from 2D Sketches and
- Edges of Solid or Surface
- Creating a Transition Surface Using the Transition Tool
- Creating an N-Sided Surface
- Creating a Silhouette Flange Surface
- Extending a Surface Using the Law Extension Tool
- Creating a Surface Offset Using the Offset Surface Tool
- Trimming and Extending a Surface Using the Trim and Extend Tool
- Trimming a Sheet by Using the Trimmed Sheet Tool
- Creating a Surface Using the Studio Surface Tool
- Creating a Surface between Two Walls Using the Styled Blend Tool
- Creating Surfaces Using the Styled Sweep Tool
- Sewing Individual Surfaces into a Single Surface
- Adding Thickness to a Surface
12: ADVANCED SURFACE MODELING
- Creating Curves from Bodies
- Creating Intersection Curves
- Creating Section Curves
- Creating Extract Curves
- Advanced Surface Modeling Tools
- Creating Dart Features
- Creating Emboss Sheet Features
- Creating Face Blend Features
- Creating Soft Blend Features
- Creating Fillet Features
- Creating Bridge Features
13: GENERATING, EDITING, AND DIMENSIONING THE DRAWING VIEWS
- The Drafting Environment
- Invoking the Drafting Environment
- Invoking the Drafting Environment Using the Drawing
- Template from the New Dialog Box
- Invoking the Drafting Environment in the Current Part File
- Editing the Drawing Sheet Parameters in the Drafting Environment
- Invoking the Drafting Tools
- Types of Drawing Views in NX
- Base View
- Projected View
- Detail View
- Section View
- Auxiliary View
- Half-Section View
- Revolved Section View
- Break-Out Section View
- Broken View
- Generating Drawing Views
- Generating the Base View
- Generating the Orthographic Drawing Views Using the Projected View Tool
- Generating the Detail View Using the Detail View Tool
- Generating Section Views Using the Section View Tool
- Generating the Half Section View Using the Half Section View Tool
- Generating the Revolved Section View
- Generating the Break-Out Section View
- Generating the Broken View
- Manipulating the Drawing View
- Aligning the Drawing Views Using the Align View Tool
- View Boundary
- Displaying the Model Using the Display Sheet Tool
- Inserting a Drawing Sheet Using the New Sheet Tool
- Modifying the Properties of a Generated Drawing View
- the Scale Value of the Drawing View
- Adding Dimensions to the Drawing Views
- Retrieving Dimensions from the Model
- Adding Dimensions to the Drawing View
- Generating Exploded Views of an Assembly
- Creating Parts List and Associative Balloons
- Creating a Parts List for an Assembly
- Creating Associative Balloons
- Creating a Tabular Note (Title Block)
- Adding Multiline Text to a Drawing Sheet
- Printing Tools
- Plot
14: SYNCHRONOUS MODELING
- Introduction
- Move Face
- Pull Face
- Offset Region
- Replace Face
- Resize Blend
- Resize Face
- Delete Face
- Copy Face
- Cut Face
- Paste Face
- Mirror Face
- Pattern Face
- Resize Chamfer
- Label Chamfer
- Make Coplanar
- Make Coaxial
- Make Tangent
- Make Symmetric
- Make Parallel
- Make Perpendicular
- Make Fixed
- Show Related Face
- Linear Dimension
- Angular Dimension
- Radial Dimension
- Shell Body
- Shell Face
- Change Shell Thickness
- Group Face
- Cross Section
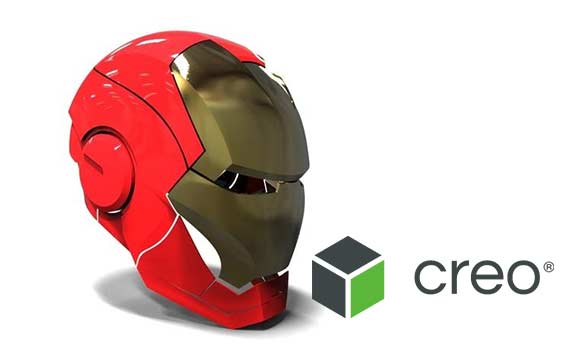
Project: CREO - IRON MAN MASK
Mechanical CAD Unigraphics NX is a mechanical CAD designing tool that is used in the development process of a product. With Unigraphics NX, one can create and design unique products through innovation. To help you accompany this, our courses in this Mechanical CAD Unigraphics NX Training in Coimbatore can help. Most of the automotive companies use this.
- Fundamentals of Parametric tools and types in NX cad
- How to design assemblies and craft accordingly
- Learn how to export and import NX cad models
- Build innovative solutions with respect to documentation, modelling, etc.
Unigraphics NX Interview Questions & Answers
If you are aware with the Unigraphics NX then there are numerous leading companies that offer job roles like Design Engineer- UG NX, Senior Design Engineer - UG NX, Senior Software Programmer – NX, Account Manager - Sales {CAD/CAM/ PLM}, many other leading roles too. If you are preparing for Unigraphics NX interview and don’t know how to crack interview and what level or difficulty of questions to be asked in job interviews then go through Cubik Cadd Unigraphics NX interview questions and answers page to crack your job interview. Underneath are the commonly asked Unigraphics NX interview questions and answers and Unigraphics NX jobs role which can make you feel relaxed to face the interviews:.
Benefits of Unigraphics NX training
Cubikcadd Unigraphics NX training in Coimbatore. It is an advanced course that is used to enhance the knowledge of solid edge software tools in India. This program is mainly intended to expand the resources and knowledge pools for the skilled professionals in the Cubikcadd Unigraphics NX Training in Coimbatore market place through extended training. The current day manufacturing companies are increasingly in demand of CAD/CAM CAE and PLM professionals to take care of turnkey projects that are cost efficient for the company. There are several benefits of the Unigraphics NX training course for CAD/CAM professionals. The NX module is vast and is also the most current in the industry.
- The person gets a valid certification from Siemens and through Siemens industry software and certified faculty. A valid certification is very valuable for a CAD/CAM professional and adds value to the resume. The training certificates are given by the Siemens Industry Software and are globally recognized.
- All the study material is given by Siemens and is authorized material worldwide for the Unigraphics NX training in Coimbatore. The study material is of high quality and is created by advanced professionals in the industry. These professionals have also created the study material for Siemens global educational team.
- The student will have access to genuine licensed software and the latest versions of it. It is important for a student to have access to authorized and licensed software which is the most current.
- All of the training is delivered by Siemens authorized professionals who have tremendous number of years of experience in the industry. Students will have access to a lot of knowledge and guidance through these professionals. The training is well structured and built to suit the working professionals. In the Unigraphics NX training courses students are exposed to several practical exercises and Live projects.
Mechanical CAD Unigraphics NX training placement
This is a 100 percent NX cad training and placement course that examines how transformational, authentic and inclusive product development styles offer an alternative to the more autocratic, job-centered and controlling designing in mechanical CAD.
Mechanical CAD Unigraphics NX certification in Coimbatore
This NX cad training in Coimbatore would be covering NX cad applications and what is the thought process behind the design of products and modeling. Are you one of those, who are both creative and innovative?
We believe in both inception and creation! Join our Mechanical CAD Unigraphics NX Training in Coimbatore and get exclusive access to certification without any additional cost!

